![How To Create Facebook App ID to Configure in Yoast or Rank Math SEO Tools? [Step-by-Step Guide]](https://a2zeducate.com/wp-content/uploads/2023/05/Article-title.png)
Introduction: Overview of Facebook App ID and Its Importance
If you want to optimize your website for social media, you need to have a Facebook App ID. A Facebook App ID is a unique identifier used to integrate your website with Facebook’s Open Graph API. This allows search engines and social media platforms to display rich content previews when your pages are shared. Whether you use Yoast SEO or Rank Math, configuring your site with a Facebook App ID enhances metadata accuracy and improves social media visibility.
Step 1: Create a Facebook Developer Account
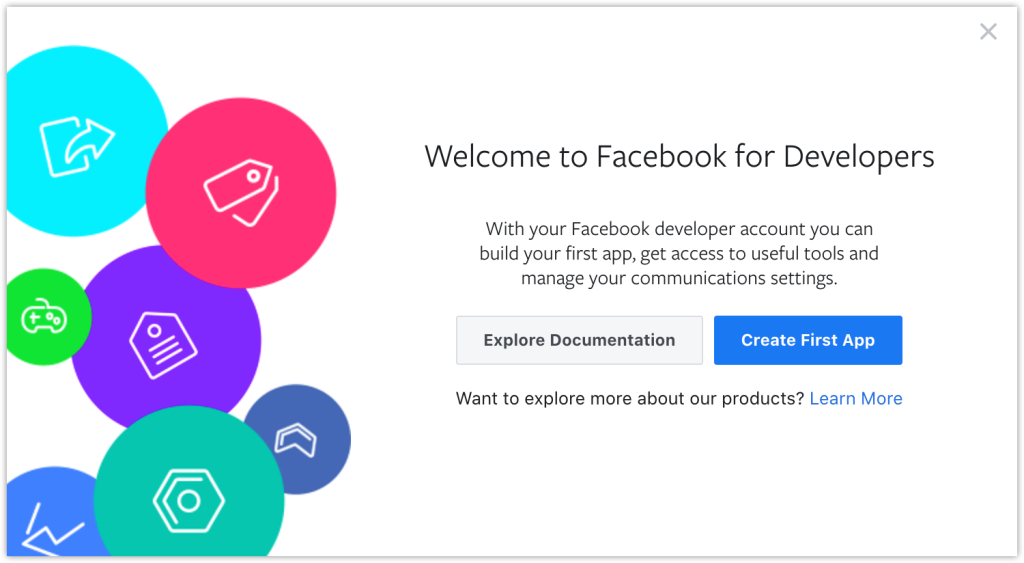
To create a Facebook App ID, you need to have a Facebook Developer account. It is different from your regular Facebook account and it allows you to access the Facebook developer tools and resources. If you already have one, you can skip this step. If not, follow these steps:
Before you can generate a Facebook App ID, you must register as a Facebook Developer.
- Visit Facebook Developers.
- Click Get Started and log in with your Facebook account.
- Accept the Developer Terms and Policies.
- Log in with your Facebook account or create a new one if you don’t have one.

- Accept the terms and conditions and verify your phone number or email address.
- Choose a username and profile picture for your developer account.
Step 2: Access the Facebook Developer Console
Once you have a Facebook Developer account, you can create a new app. An app is a container for your website’s settings and features on Facebook. Follow these steps:
After setting up your developer account, follow these steps:
- Navigate to Facebook Developer Console.
- Click on My Apps in the top-right corner.
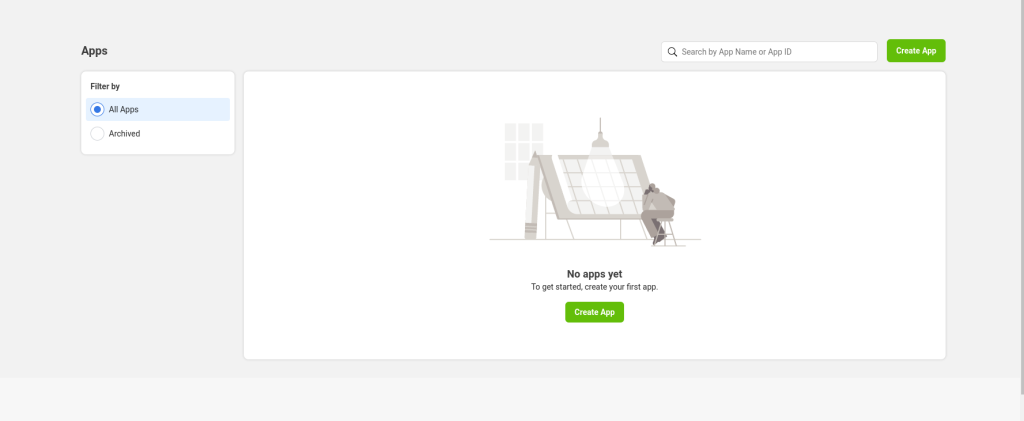
- Select Create App to begin the process.
- Go to https://developers.facebook.com/apps/ and click on “Create App”.
Step 3: Create a New App
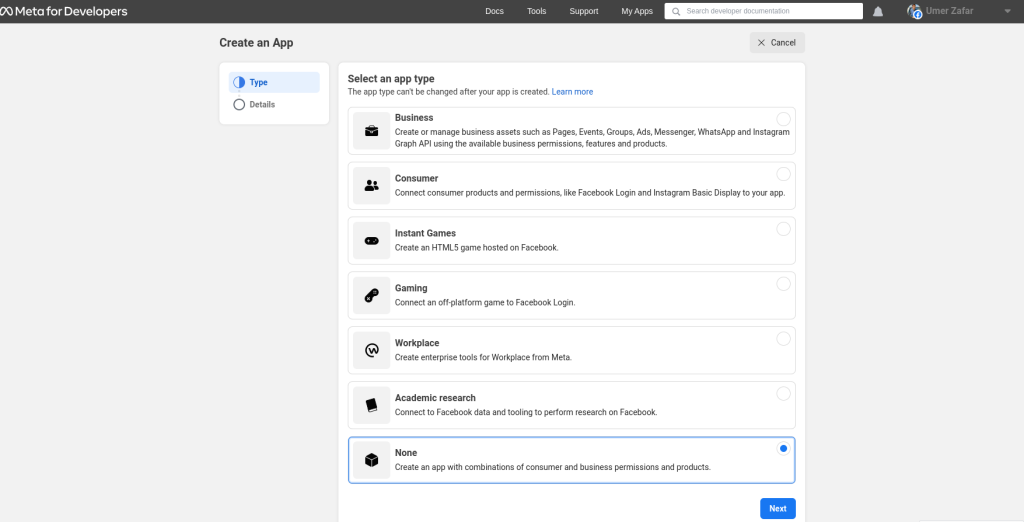
- Choose an app type based on your requirements. For SEO purposes, select Business Integration.
- Enter an App Name and your Email Address.
- Click Create App and complete the verification process.
Step 4: Configure App Settings
- Under the Settings tab, select Basic.
- Fill in your website’s details:
- App Domain
- Privacy Policy URL
- Terms of Service URL
- Contact Email
- Click Save Changes.
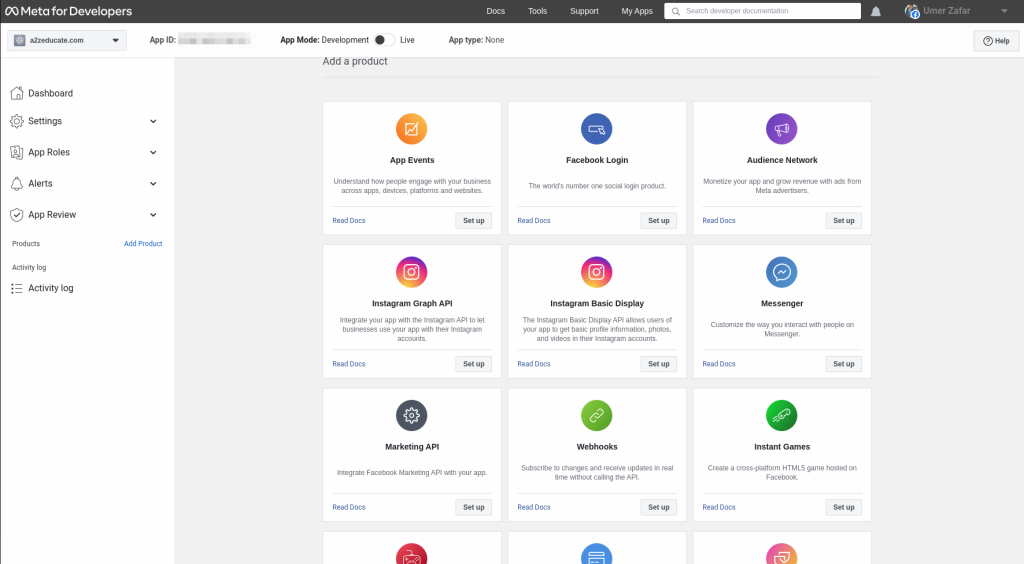
- If you would like to add Facebook Login for Business or Gaming, as well as create apps to track ads and manage your business, select the Other option when creating your app.
- If you select Other, meaning you want to implement ads, gaming, or messaging, perhaps in addition to Facebook Login, you’ll be redirected to more applications selection.

The products and APIs available to your app are dependent on the app type you choose. If you are new to app creation and want to explore the process, we recommend selecting the “None” option. Once you are more familiar with our products and APIs, refer to our app types document to determine the best app type for your needs. You can then create a new app and select the appropriate type.
Step 5: Set your app name and email
- Choose a display name and contact email for your app. You can also choose a category for your app, but this is optional.
- Click on “Create App ID” and complete the security check.
- You will be redirected to your app dashboard, where you can see your app ID. Copy and save this app ID somewhere, as you will need it later.
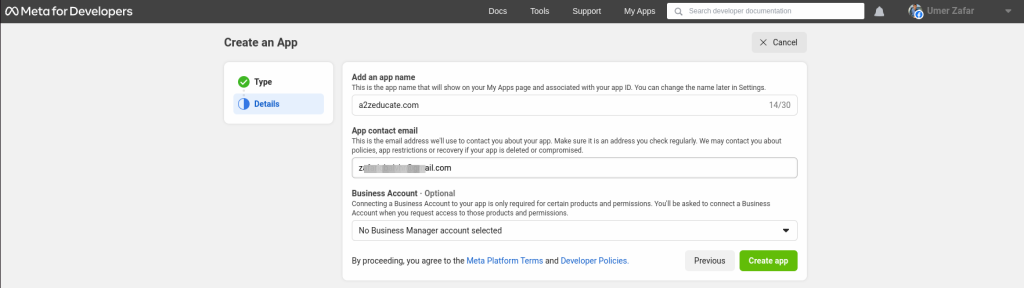
Once you have completed the app creation flow your app will be loaded in the App Dashboard.
Step 6: Configure Your App Settings
Now that you have created your app, you need to configure some settings to make it work with your website. Follow these steps:
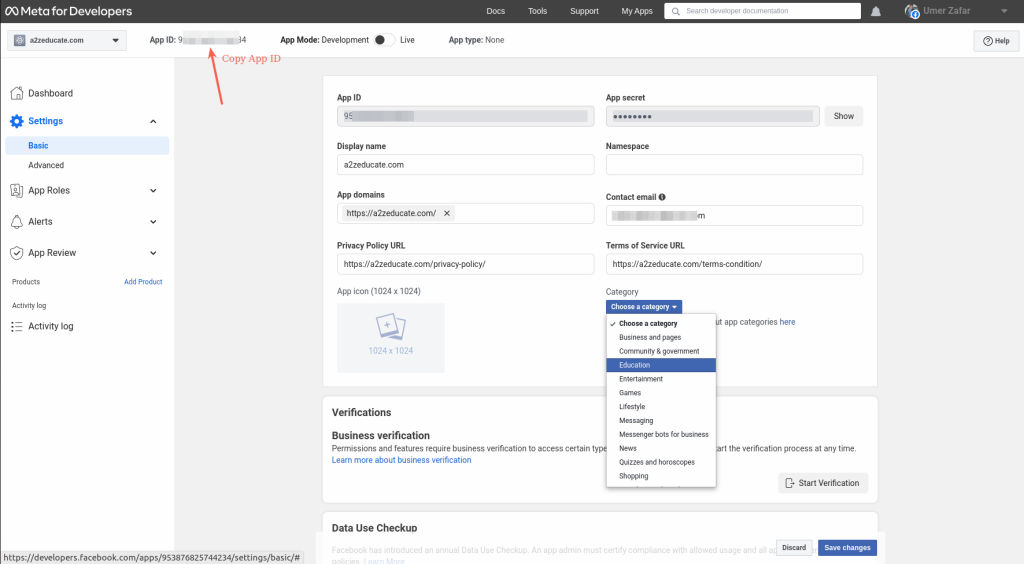
- Go to your app dashboard and click on “Settings” in the left sidebar.
- Under “Basic”, fill in the following fields:
- App Domains: Enter your website’s domain name e.g.www.a2zeducate.com.
- Privacy Policy URL: Enter the URL of your website’s privacy policy page e.g. Privacy Policy for A2Z Educate.
- Terms of Service URL: Enter the URL of your website’s terms of service page e.g. https://example.com/terms-of-service/
- App Icon: Upload an image that represents your app (e.g., your website’s logo).
- Click on “Save Changes” at the bottom of the page.
- Under “Products”, click on “Set Up” next to “Facebook Login”.
- Under “Settings”, fill in the following fields:
- Valid OAuth Redirect URIs: Enter the URL of your website’s homepage (e.g., https://a2zeducate.com/).
- Enforce HTTPS: Check this box if your website uses HTTPS (recommended).
- Click on “Save Changes” at the bottom of the page.
Step 7: Copy Your Facebook App ID
Now that you have added the website platform to your app settings, you can copy your Facebook App ID from the same page. This is the unique identifier that you need to configure in Yoast or Rank Math SEO tools.
To copy your Facebook App ID
- go to https://developers.facebook.com/apps/ and select your app from the dashboard.
- Then click on the “Settings” menu on the left side and choose “Basic”.
- Under the “App Details” section, you will see your Facebook App ID next to the display name of your app.
- You can copy it by clicking on the “Copy” button and paste in yoast SEO of WordPress plugin.

Step 7: Configure Your Facebook App ID in Yoast or Rank Math SEO Tools
The final step is to configure your Facebook App ID in Yoast or Rank Math SEO tools. This will enable the social media features for your website and allow you to customize how your content appears when shared on Facebook. To configure your Facebook App ID in Yoast or Rank Math SEO tools, follow these steps:
If you are using Yoast SEO tool:
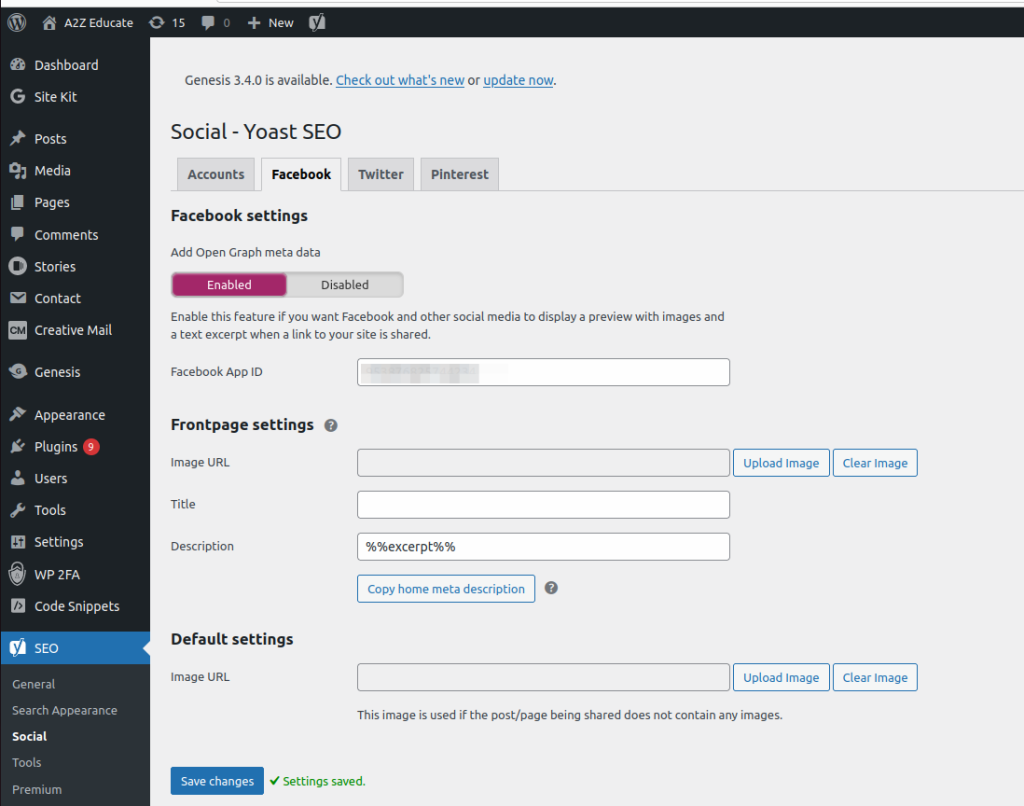
- Go to your WordPress dashboard and click on “SEO” in the left sidebar.
- Click on “Social” and then on “Facebook”.
- Under “Facebook settings”, check the box that says “Add Open Graph meta data”.
- Under “Default settings”, enter your Facebook App ID in the field that says “Facebook App ID”.
- Click on “Save Changes” at the bottom of the page.
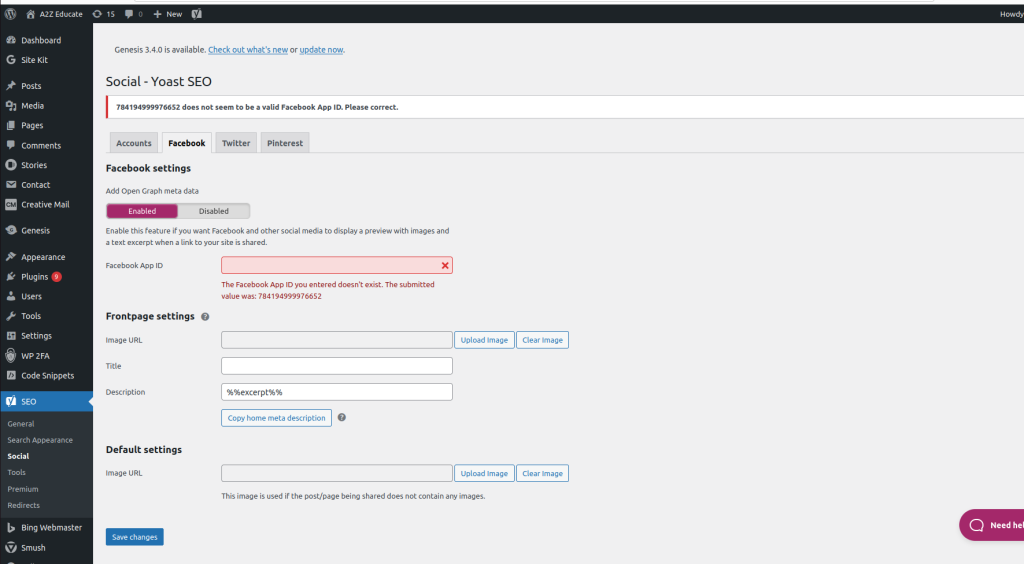
if you are facing error message in Yoast SEO tool.
- then go to facebook page from where copied ID https://developers.facebook.com/
- change app mode to Live
- then try to save changes, you will face message successfully.
Rank Math:
- Go to your WordPress dashboard and click on “Rank Math” in the left sidebar.
- Click on “General Settings” and then on “Social Media”.
- Under “Facebook”, check the box that says “Enable Open Graph Meta Data”.
- Under “App ID”, enter your Facebook App ID in the field that says “Facebook Application ID”.
- Click on “Save Changes” at the bottom of the page.
Best Practices for Using Facebook App ID
- Keep your App ID private to prevent misuse.
- Regularly update your metadata for better SEO performance.
- Monitor Facebook Insights to analyze engagement trends.
FAQs
1. Why do I need a Facebook App ID for SEO?
A Facebook App ID ensures proper Open Graph integration, improving how your content appears on social media.
2. Is it free to create a Facebook App ID?
Yes, registering as a Facebook Developer and generating an App ID is completely free.
3. Can I use the same Facebook App ID for multiple websites?
Yes, but it’s best to create a separate App ID for each website for better tracking and security.
4. What happens if I delete my Facebook App ID?
Your Open Graph integration will break, leading to improper content previews on Facebook.
5. Do I need coding knowledge to set up a Facebook App ID?
No, the process is straightforward and requires no coding.
6. How often should I update my Open Graph settings?
Update them whenever you make major site changes to maintain accurate metadata.
Conclusion
A Facebook App ID is essential for optimizing how your website’s content appears on social media. Whether using Yoast SEO or Rank Math, integrating your App ID ensures proper Open Graph metadata, leading to better engagement and SEO performance. Follow this guide to set up your App ID, verify the configuration, and troubleshoot common issues.
That’s it! You have successfully created a Facebook App ID and configured it in your SEO plugin. Now you can enjoy the benefits of social media optimization for your website and increase your traffic and engagement. Happy blogging!
Read More Topics
How to Find Bing Verification Code in Webmaster Tools
Steps to make Bing index your WordPress website in webmaster tools



![How to Set Up Mail Forwarding in Procmail on Ubuntu? [Step-by-Step Guide]](https://a2zeducate.com/wp-content/uploads/2025/03/Procmail-on-Ubuntu-1-150x150.png)